
Wrong password provided
This is by far the most common reason for MySQL ERROR 1045 (28000): Access denied for user ‘user’@’localhost’ (using password: YES).
MySQL lists user accounts in the table of the database. Each MySQL account can be assigned a password, although the table does not store the cleartext version of the password, but a hash value computed from it.
You cannot read user passwords in plain text from MySQL as the password hash is used for authentication, but if you can get into MySQL command line interface (with root privileges), you can compare what you remember with the hashed value with “PASSWORD” function with the command below.
From the output, we can clearly see that the hashed value for ‘forgotten’ does not match the authentication_string column, which means ‘forgotten’ is the wrong password.
Executing the following query will overwrite the current password with a new one :
Исправляем ошибку access denied for user root localhost
1. Подключение с другого хоста
Сначала рассмотрим как работать с Phpmyadmin. Это намного проще для начинающих и тех, кто не любит работать в терминале. Откройте Phpmyadmin, авторизуйтесь в программе с правами root и перейдите на вкладку «Учетные записи пользователей»:
Здесь, вы увидите, кроме обычных полей, поле «имя хоста», которое указывает с какого хоста может подключаться пользователь. Если в этом поле написано localhost, значит этот пользователь может авторизоваться только с локальной машины. Также, в этом поле может находиться IP адрес, с которого есть разрешение или символ %, который означает, что пользователь может подключаться с любого IP.
Чтобы изменить права для пользователя, нужно нажать на ссылку «Редактировать привилегии» для него, на открывшейся странице перейдите на вкладку «Информация об учетной записи»:
Затем установите в поле «Имя хоста» значение «Любой хост» чтобы разрешить этому пользователю авторизоваться с любого IP. Если вы хотите разрешить только определенный IP, выберите «Использовать текстовое поле» и укажите нужный адрес или подсеть:
После этого останется нажать кнопку «Вперед» чтобы сохранить настройки. Если вам нужно чтобы был доступ и с локального IP, и с другого, то необходимо создать еще одного пользователя. После этого вы сможете авторизоваться от имени этого пользователя.
Теперь рассмотрим другой способ решить ошибку 1045 access denied for user root localhost, с помощью терминала. Это немного проще, поскольку вам нужно только выполнить несколько команд:
> UPDATE mysql. user SET Host=’%’ WHERE Host=’localhost’ AND User=’имя_пользователя’;
> UPDATE mysql. db SET Host=’%’ WHERE Host=’localhost’ AND User=’имя_пользователя’;
> FLUSH PRIVILEGES;
Уже после этого, вы можете подключаться к серверу баз данных с любого другого компьютера и не получите никаких ошибок. Вместо символа %, можно указать нужный ip или localhost, если ограничение нужно вернуть обратно.
2. Неверный пароль root
Иногда случается, что при установке базы данных пароль для root задается, но вы его не знаете. Поскольку это главный пользователь и если вы не можете войти от его имени, то вы не сможете ничего исправить. Сначала попробуйте авторизоваться от имени root в системе и подключиться к базе без пароля:
Иногда это работает. Если не сработало, остановите службу mysql и запустите ее без проверки безопасности, а затем попробуйте снова:
Systemctl stop mysqld
Mysqld —skip-grant-tables
Mysql
> USE mysql;
> UPDATE user SET Password=PASSWORD(‘ваш_пароль’) where USER=’root’;
> FLUSH PRIVILEGES;
Еще можно попытаться выдать права над всеми таблицами нашему пользователю, если это необходимо:
> GRANT ALL ON *.* TO ‘root’@’localhost’ WITH GRANT OPTION;
Обратите внимание на хост localhost, если вы хотите чтобы удаленные узлы тоже могли подключаться к этому пользователю, то нужно использовать %. Дальше можно перезапустить базу данных и работать как обычно
Method 1: The easiest way to fix error 1698 (28000): Access denied for user
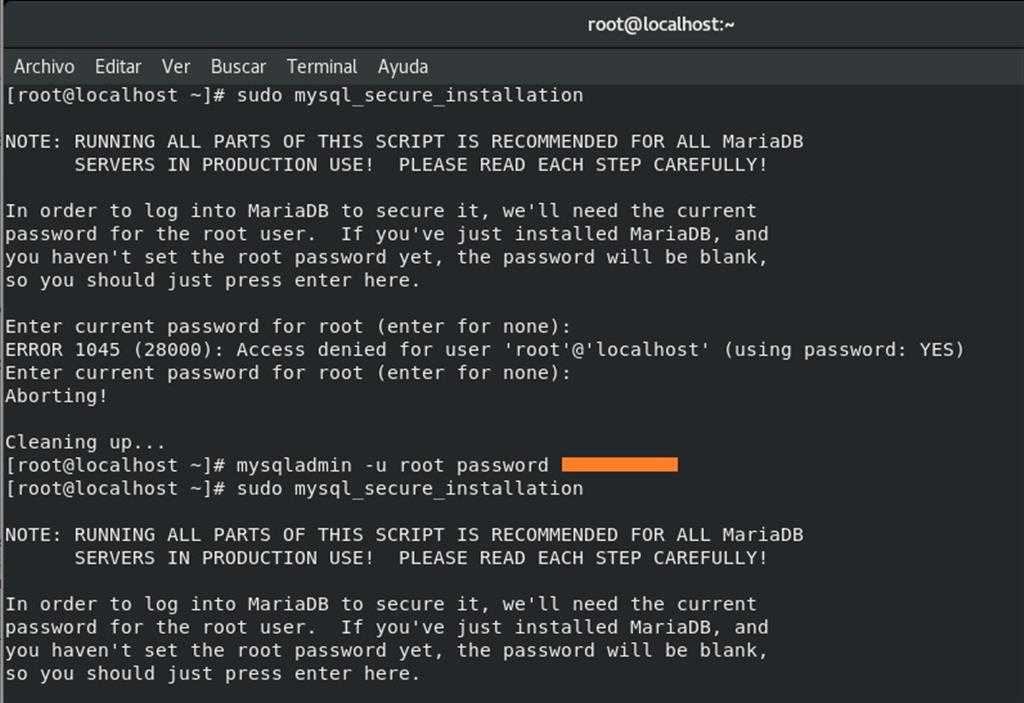
One of the easiest ways to resolve this error is to invoke “mysql_secure_installation”, which will ask you to set a password for your MySQL root user.
You need to enter a new password and, for confirmation, re-type that password.
If the password is less than 25 characters, you will be prompted to confirm whether you want to continue or not. If you don’t want to set password characters more than 25, simply type “n”.
![]() Fix error using mysql_secure_installation
Fix error using mysql_secure_installation
In my case, it didn’t work and threw me an error on-screen:
If the same thing happens with you too, then close the terminal and follow the second set of steps, which worked for me.
Method 1: Create a New Superuser for phpMyAdmin
In terminal, log in to MySQL as . You may have created a root password when you installed MySQL for the first time or the password could be blank. If you have forgotten your root password, you can always Reset the MySQL Root Password.
Now add a new MySQL user with the username of your choice. In this example we are calling it . Make sure to replace with your own. You can generate a strong password here.
The command below will create a new user called (call this what you like) which can access the MySQL server from with the password .
Now we will grant superuser privilege to our new user .
You should now be able to access phpMyAdmin using this new user account.
If you are getting an error for this new user “Access denied for user (using password: YES)”, please read this article.
If you are getting an error “Failed to set session cookie. Maybe you are using HTTP instead of HTTPS”, please read this article.
Fixing ” Access denied for user ‘username’@’host’ (using password: YES) error”
In our side troubleshooting, we found that the connection from the outside world is blocked by the server by default for security reasons. This is a normal security provision arranged by a web hosting company to avoid unauthorized access.
To solve this problem, you have to either allow your static IP or give a wildcard ‘%’ entry.
1
Step-1 : Access Remote MySQL from your web hosting cPanel
Remote MySQL in cPanel
Log into your web hosting cPanel, and then look for the “Remote MySQL” icon under the database section. It will look like in the given screenshot.
Click on Remote MySQL, it will open the configuration screen.
2
Step-2 : Add access host
Add Access Host in cPanel
From here you have to allow the IP address to access the SQL server from database tools like Workbench, HeidiSQL installed on your local PC. You have three options here
- add “%“, it is wild card entry it will allow all IPs to access SQL server with login credentials
- add fixed IP (for example: 24.54.155.12), only if you have one
- add IP range if you are using multiple IPs (for example 174.77.92.%.)
Remember Allowing ‘%’ all IP to access DB creates a large security hole, always use strong login credentials.
3
Step 3: Retry connection
After this step, retry connecting. The problem “Access denied for user ‘username” should have been solved. If not check your username and password again and check if your tools are allowed through the firewall.
Method 2: Change root Authentication Method
In order to log into phpMyAdmin as your root MySQL user, you will need to switch its authentication method from or to .
Open up the MySQL prompt from your terminal:
Run the following query.
Output:
Above we can see that the plugin for the root account is set to . This may also say . You need to change this to . Also, the host value should be set to or . If it’s set to anything else, you may not be able to log into phpMyAdmin with root. See:
Run the following query to change the plugin value to . Make sure to replace with your own. Click here if you need to generate a new password.
Flush privileges.
You should now be able to log into phpMyAdmin using your root account.
Служба mysqld не может запуститься так как порт 3306 используется другой программой
По умолчанию служба mysqld использует порт 3306 если этот порт использует другой процесс, то это является препятствием для запуска MySQL и в конечном счёте появляется рассматриваемая ошибка.
Для решения проблемы выясните, какая служба прослушивает порт 3306. Например, это можно сделать командой:
sudo lsof -Pn -iTCP:3306
А затем остановите эту служу и удалите её из автозагрузки.
Либо можно использовать альтернативный вариант — настроить службу mysqld прослушивать другой, отличный от дефолтного порта. Но это может повлечь необходимость явно указывать порт в любых приложениях, которые подключаются к СУБД MySQL.
Что делать?
Во-первых, нужно убедиться, что вы используете правильные имя пользователя и пароль. Для этого нужно подключиться к MySQL с правами администратора (если ошибка 1045 не дает такой возможности, то нужно перезапустить сервер MySQL в режиме —skip-grant-tables), посмотреть содержимое таблицы user служебной базы mysql, в которой хранится информация о пользователях, и при необходимости отредактировать её.
SELECT user,host,password FROM mysql.user;
+—————+——————+——————————————-+
| user | host | password |
+—————+——————+——————————————-+
| root | house-f26710394 | *81F5E21E35407D884A6CD4A731AEBFB6AF209E1B |
| aa | localhost | *196BDEDE2AE4F84CA44C47D54D78478C7E2BD7B7 |
| test | localhost | |
| new_user | % | |
| | % | *D7D6F58029EDE62070BA204436DE23AC54D8BD8A |
| new@localhost | % | *ADD102DFD6933E93BCAD95E311360EC45494AA6E |
| root | localhost | *81F5E21E35407D884A6CD4A731AEBFB6AF209E1B |
+—————+——————+——————————————-+
Если изначально была ошибка:
-
ERROR 1045 (28000): Access denied for user ‘root’@’localhost’ (using password: YES)
значит вы указывали при подключении неверный пароль, так как пользователь root@localhost существует. Сам пароль храниться в зашифрованном виде и его нельзя узнать, можно лишь задать новый
SET PASSWORD FOR root@localhost=PASSWORD(‘новый пароль’);
-
ERROR 1045 (28000): Access denied for user ‘ODBC’@’localhost’ (using password: YES)
в данном случае в таблице привилегий отсутствует пользователь ‘ODBC’@’localhost’. Его нужно создать, используя команды GRANT, CREATE USER и SET PASSWORD.
Экзотический пример. Устанавливаете новый пароль для root@localhost в режиме —skip-grant-tables, однако после перезагрузки сервера по прежнему возникает ошибка при подключении через консольный клиент:ERROR 1045 (28000): Access denied for user ‘root’@’localhost’ (using password: YES)
Оказалось, что было установлено два сервера MySQL, настроенных на один порт.

![[solved] mysql: access denied for user 'username'@'host' (using password: yes) error in workbench, heidisql](https://clipof.ru/wp-content/uploads/4/2/a/42a08460fb09c7e5e5fdc6d98a00a532.jpeg)

Настройка phpMyAdmin
Нам нужно сделать небольшую настройку для phpMyAdmin. Введите команду
sudo gedit /etc/apache2/apache2.conf
Она откроет текстовый файл. Пролистните этот файл до самого конца и в самый низ добавьте строку:
Include /etc/phpmyadmin/apache.conf
![]()
Перезапустите веб-сервер, чтобы изменения вступили в силу:
sudo systemctl restart apache2
![]()
По умолчанию phpMyAdmin не позволяет входить без пароля. Если вы не установили пароль для СУБД MySQL, то у вас на выбор две опции:
- установить пароль
- внести изменения в настройку phpMyAdmin, чтобы он разрешал вход без пароля
Рекомендуется задать пароль для базы данных. Для изменения пароля можно воспользоваться скриптом:
sudo mysql_secure_installation
Если вы хотите разрешить входить в phpMyAdmin без пароля, то откройте файл
sudo gedit /etc/phpmyadmin/config.inc.php
Найдите вторую (их там две) строку
// $cfg = TRUE;
и раскомментируйте её (уберите два слеша из начала строки), чтобы получилось:
$cfg = TRUE;
Скорее всего, при подключении вас ждёт сюрприз в виде ошибки «#1698 — Access denied for user ‘root’@’localhost’». Пошаговые действия для её решения в этой инструкции.
![]()
Reason of Access denied Error
Access denied error for user ‘root’ problem occurs mostly when you un-install and install a new version or even previous version also. The problem lies in in-complete cleanup done by mysql uninstaller wizard. So, solution is also very simple, cleanup remaining junk manually.
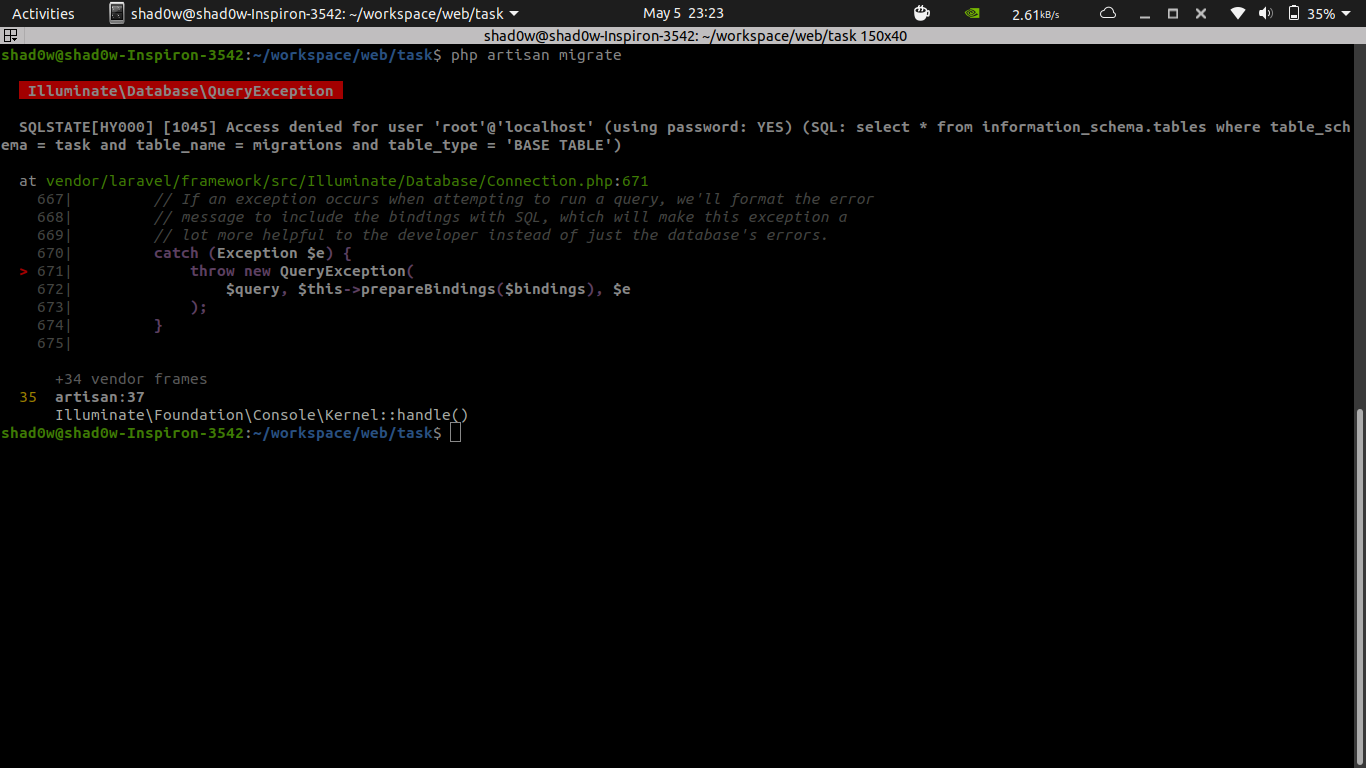
You exception will look like this:
Caused by: java.sql.SQLException: Access denied for user 'root'@'localhost' (using password: YES)
 at com.mysql.jdbc.SQLError.createSQLException(SQLError.java:1055)
 at com.mysql.jdbc.SQLError.createSQLException(SQLError.java:956)
 at com.mysql.jdbc.MysqlIO.checkErrorPacket(MysqlIO.java:3491)
 at com.mysql.jdbc.MysqlIO.checkErrorPacket(MysqlIO.java:3423)
 at com.mysql.jdbc.MysqlIO.checkErrorPacket(MysqlIO.java:910)
 at com.mysql.jdbc.MysqlIO.secureAuth411(MysqlIO.java:3923)
 at com.mysql.jdbc.MysqlIO.doHandshake(MysqlIO.java:1273)
 at com.mysql.jdbc.ConnectionImpl.createNewIO(ConnectionImpl.java:2031)
 at com.mysql.jdbc.ConnectionImpl.init(ConnectionImpl.java:718)
 at com.mysql.jdbc.JDBC4Connection.init(JDBC4Connection.java:46)
 at sun.reflect.NativeConstructorAccessorImpl.newInstance0(Native Method)
 at sun.reflect.NativeConstructorAccessorImpl.newInstance(Unknown Source)
 at sun.reflect.DelegatingConstructorAccessorImpl.newInstance(Unknown Source)
 at java.lang.reflect.Constructor.newInstance(Unknown Source)
 at com.mysql.jdbc.Util.handleNewInstance(Util.java:406)
 at com.mysql.jdbc.ConnectionImpl.getInstance(ConnectionImpl.java:302)
 at com.mysql.jdbc.NonRegisteringDriver.connect(NonRegisteringDriver.java:282)
 at java.sql.DriverManager.getConnection(Unknown Source)
 at java.sql.DriverManager.getConnection(Unknown Source)
 at org.hibernate.connection.DriverManagerConnectionProvider.getConnection(DriverManagerConnectionProvider.java:110)
 at org.hibernate.jdbc.ConnectionManager.openConnection(ConnectionManager.java:417)
 ... 5 more
Comments
Copy link Quote reply
When installing version 2.0.3.1 on localhost (using Linux SUSE), I was given the error: «Access denied for user ‘root’@’localhost’ (using password: YES)»
The password I always use for accessing 127.0.0.1 contains an ampersand; this was not being decoded properly.
You have already deployed ‘html_entity_decode’ for the file ‘install/controller/step_3.php’ on lines 35 and 73. However to resolve the issue, I also had to add ‘html_entity_decode’ to line 267 as follows: Replaced: $this->request->post With: html_entity_decode($this->request->post, ENT_QUOTES, ‘UTF-8’)
I also needed to add decoding for the file ‘instal/model/install.php’ on line 4 as follows: Replaced: $data With: html_entity_decode($data)
Decoding the password in these two places resolved the issue.
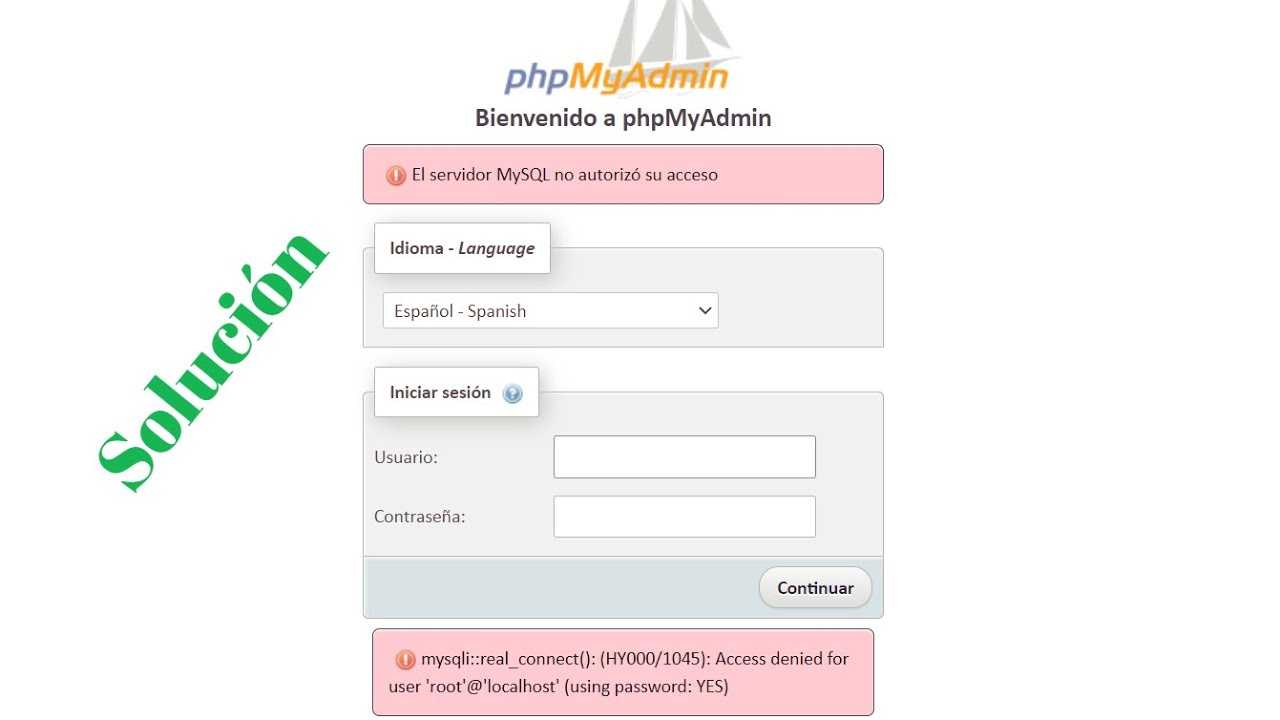
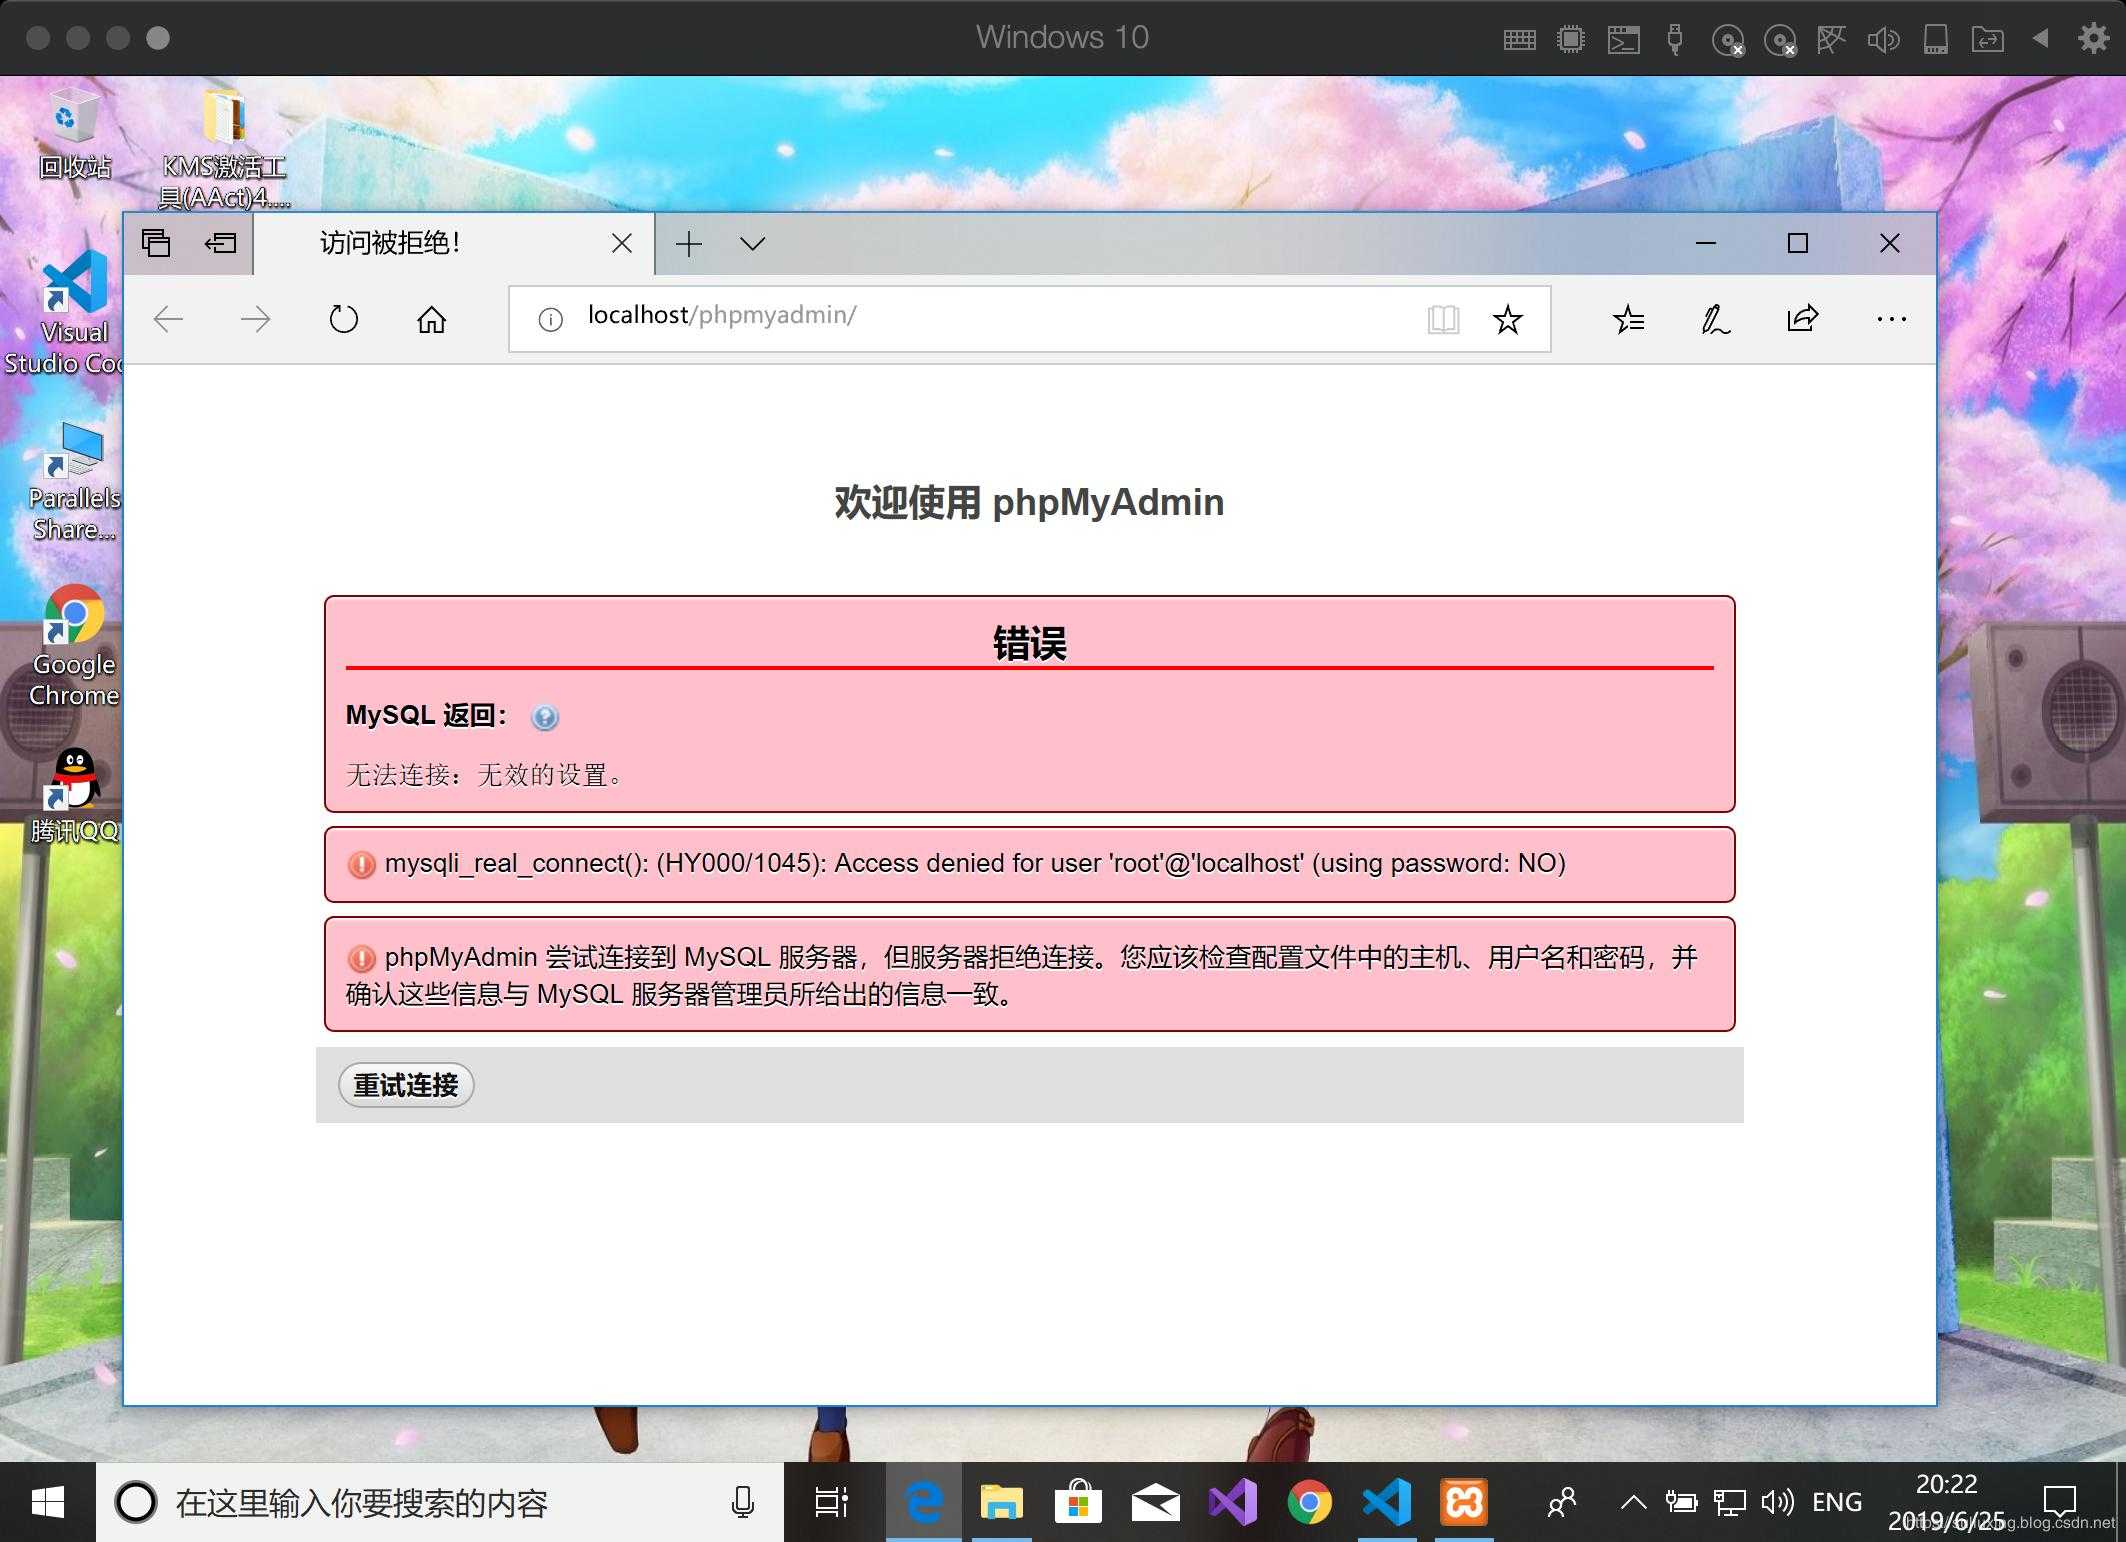
Если при попытке входа в phpMyAdmin вы видите ошибку:
то данная статья поможет вам разобраться в проблеме и устранить её.
MySQL 5.7 изменила модель безопасности: теперь вход в MySQL под рутом (root) требует sudo (при этом пароль всё равно может быть пустым). Т.е. phpMyAdmin невозможно использовать под пользователем рутом.
Самым простым (и самым безопасным) решением будет создать нового пользователя и предоставить ему требуемые привилегии.
Но начнём мы с другого решения:
Убедитесь, что служба MySQL/MariaDB настроена правильно
Если причина проблемы оказалась в том, что служба не запущена и после попытки запуска служба вновь оказалась неактивной, значит проблема может быть в неправильной настройке сервера MySQL/MariaDB.
Файлы конфигурации (настроек) MySQL и MariaDB могут размещаться в разных директориях, например:
- /etc/my.cnf
- /etc/mysql/my.cnf
- /var/lib/mysql/my.cnf
При этом в файлах могут быть установлены различные значения одной и той же настройки, что приводит к проблеме. Устраните противоречие, либо удалите или переименуйте один из файлов и попробуйте вновь запустить службу.
На что стоит обратить внимание в конфигурационных файлах
Если вы хотите сохранить оба конфигурационных файла, то проверьте, чтобы значение socket было одинаковым. Также для bind-address должен быть установлен правильный IP адрес. Если к этому серверу подключаются только приложения, которые запущены на этом же сервере, то в качестве значения bind-address нужно прописать localhost или 127.0.0.1
Why My SQL error 1045 access denied for user occurs?
Many times a user might encounter this error multiple times in his work. This issue occurs most of the times due to entering incorrect user-name or password. However, this is one of the reasons, but there might be other changes also by which the user may receive this MySQL error. Most of the time it looks identical but when we go into the deep study we came to know that multiple other factors are also contributing to this error. Let’s discuss the common reasons and work around them to solve this error.
Feasible reasons:
- Type error: Incorrect user-name or password.
- Accessing from the wrong host.
- User doesn’t exist on the server.
- A Mix of numeric and name-based hosts.
Method 2: Fix error 1698 (28000): Access denied for user using Alter
When you install MySQL for the first time, there may be a chance you will not find the option to set a password. If it is like that, then you need to login into MySQL as a root user.
![]() MySQL Error 1698(2800)
MySQL Error 1698(2800)
To resolve this, you must log into MySQL as a sudo on the new installation because the account that is linked with MySQL is the “root” account, not the “user” account.
Run the below command in your terminal:
Once you are logged in, you will find the MySQL console looking like the below-shown image.
![]() Login to MySQL with sudo
Login to MySQL with sudo
Now you can access your MySQL account with the above command, but there is a small problem with this like you cannot log in to MySQL without sudo privileges, and MySQL can be accessed by any privilege or sudo user.
To prevent that, you can set a password prompt to appear whenever anyone tries to log in.
There are different types of password mechanisms supported by MySQL by default you will find “auth_socket” for your root account to make it robust you can choose conventional “mysql_native_password” or the latest “caching_sha2_password“ on later version 8.0.0
If you want to learn more about authentication plugins, then do check out MySQL authentication documentation.
Before moving to the next step, you should check what password mechanism or plugin is attached to your root account to find out that you can run the following queries on the MySQL console.
The behavior of the above command is shown below:
![]() Check password plugin in MySQL
Check password plugin in MySQL
Set a password on the root account
Now you can set or update your password by following the below snippet. Make sure to replace with your password and, prior to that, select the MySQL database.
Output:
![]() Set Password on MySQL
Set Password on MySQL
I’m using “caching_sha2_password”. If you want to use “mysql_native_password” on > MySQL 5.7 version, type the below queries on your MySQL console.
Once the changes have been implemented, restart the MySQL service.
And once the service is restarted, type the below code in your terminal and enter the password which you have set above.
Output:
![]() Login back to MySQL after resolving the error
Login back to MySQL after resolving the error
That’s all to fix this error.
Неверно указан хост для подключения
Для указания удалённого хоста используется опция -h. Из-за привычки указывать хост после имени пользователя через знак @ (как это делается, например, для SSH), либо указывать удалённый хост без опции -h, команда может оказаться неверной в том плане, что вместо подключения к удалённому хосту, вы пытаетесь подключиться, например, к своей собственной системе, на которой служба MySQL не установлена.
Следовательно, отредактируйте команду, используйте опцию -h или более длинный вариант —host=имя_хоста для указания хоста, к которому вы хотите подключиться.
Кстати, для указания имени пользователя используется опция -u. Если пароль отличается от стандартного, то используется опция -P (заглавная буква). Опция -p (прописная буква) используется для указания базы данных, которая выбирается для использования.


Пример команды:
mysql -h 127.0.0.1 -P 3306 -u root -p <database>
Служба mysqld по умолчанию не добавляется в автозагрузку на некоторых дистрибутивах
Помните, что на некоторых дистрибутивах (например, производных Arch Linux, на Kali Linux) даже после установки MySQL или MariaDB они не добавляются в автозагрузку и не запускаются по умолчанию.
Для запуска службы и её авто старта при последующих включениях компьютера выполните команды:
sudo systemctl start mysqld.service
sudo systemctl enable mysqld.service
Changing a MySQL User’s Host Value
You can change the host value for a user using the MySQL root account or any account with superuser privileges. This can be done via command line or phpMyAdmin.
Via Command Line
You will need to access your MySQL database using root or a superuser that has access to the MySQL Users table.
The root account is by default only accessible from localhost, so you may get “Access denied for user (using password: YES)” if you try and log in remotely. In such eventuality, you will need to somehow gain local access to the server.
To log into a local MySQL database:
To log into a remote MySQL database, simply replace with your own.
Once logged into MySQL, list all MySQL users and their corresponding hosts in your database.
Result:
Above we can see a list of MySQL users and their hosts.
If we want to log in using remotely from anywhere, we must change the host value to the wildcard, which will allow remote login from anywhere. For heightened security, you could change this to an IP address.
In the example below, we are changing the host for from to
means wildcard and will allow this user to log in remotely from anywhere.
You must flush MySQL privileges for changes to take affect.
Now try logging in again remotely.
Via phpMyAdmin
Log into phpMyAdmin using your root account or an account with superuser privileges.
- Once logged into phpMyadmin, click the database in the left-hand column.
- Click the SQL tab.
- Type or paste into the SQL query box: to list all MySQL users in the database.
- Click Go to run the query.
![]()
You should now see a list of all MySQL users and their corresponding hosts.
To change the host value of a MySQl user:
- Double-click the host field beside the user your wish to change (in red below).
- Type to allow anyone to log into this user from anywhere. You could also change this to a remote IP for better security.
- Press on your keyboard to save changes.
![]()
You’re not done yet. You must now flush MySQL privileges.
- Click the SQL tab again
- Type or paste into the SQL query box:
- Click Go to run the query.
![]()
You should now be able to log in remotely.
Let me know if this helped. Follow me on , and YouTube, or buy me a smoothie.
p.s. I increased my AdSense revenue by 200% using AI . Read my Ezoic review to find out how.
Methods to solve error 1045 access denied for user
I have come up with these easy methods to resolve the issue from the MySQL application. You can opt any of the methods and follow it correctly to fix MySQL error 1045 access denied for user.
#Method 1: Using cmd
- Open command prompt window and access XAMPP directory: cd ../../Program/Files/xampp.
- Now xampp>>mySQL>>bin.
- Now run the command: mySQL.exe –user=root –password=.
- This command starts command line and we can change -user=and -password=accordingly.
#Method 2: Creating a batch file
In the xampp folder create a file mySQL_command.bat and edit it with any text editor and paste it here:
@echo off
echoMySQL command line…
MySQL\bin\mySQL.exe –user=root –password=
pause
Save this file and modify user-name & password if you changed the username and password. Now run the command.bat and cmd will show with MySQL command line in running condition.
#Method 3: Configure file config.inc.php
- localhost->xampp->phpmyadmin->config.inc.php
- Open the file on any text editor.
- Find this code code$cfg =”; MySQL password.
- Now change the password which you have created earlier.
- Click the Save button.
MySQL Database Recovery Software
If you are facing issues with the manual methods or unable to fix the issue by own then you can go for the automated method i.e using MySQL Database Recovery tool. This utility is designed to recover the valuable data from corrupt MySQL database. This advance tool helps to recover and save the maximum possible MySQL data in the form of a script or in a fresh database.
To Sum Up
Manual methods need the user to be an expert in MySQL database commands. In this blog, I have told you the simple manual methods to fix MySQL error 1045 access denied for user. If you are able to do it yourself then go for them but if you are an IT expert or any issue occurs then you can try MySQL Database Recovery Software.
Tags: mysql error 1045
Access Denied Error
When you try to connect to a MySQL database on your own computer (called “localhost”), you may get this error:
Access denied for user 'root'@'localhost' (using password: YES)
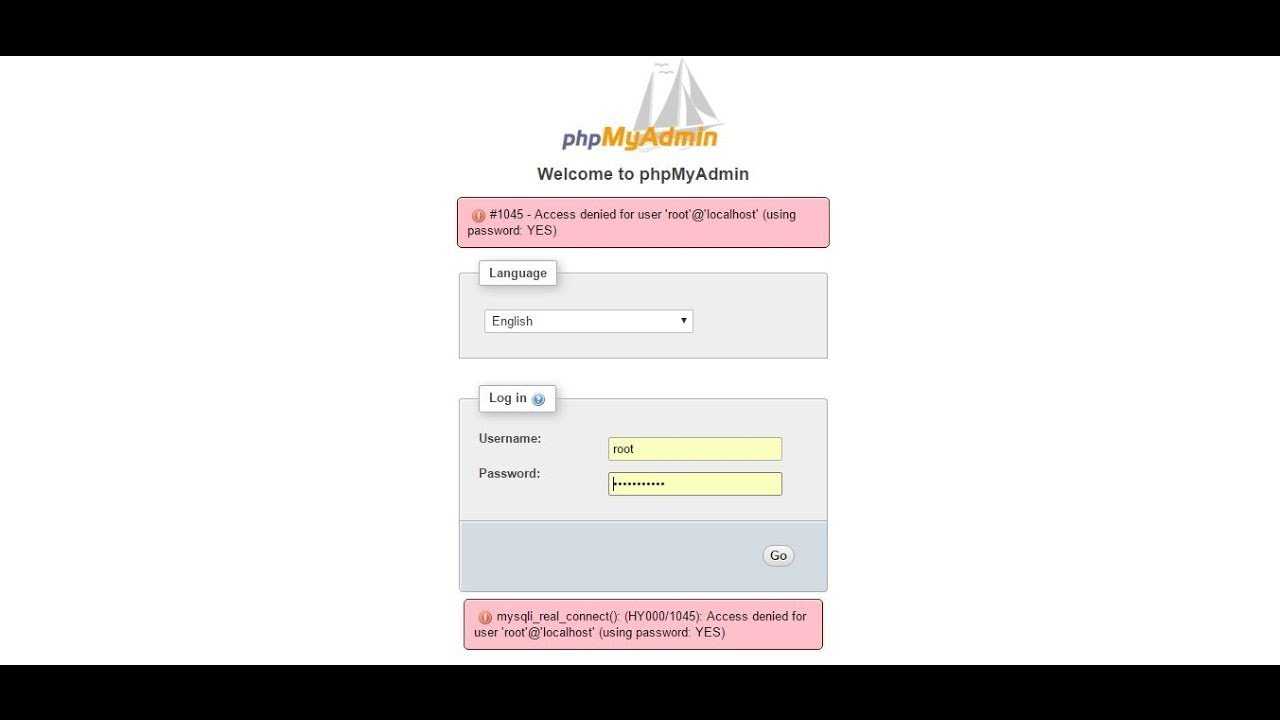
You might get an error code in front of it:
ERROR 1045 (28000): Access denied for user 'root'@'localhost' (using password: YES)
You might also get the error with “using password no”:
Access denied for user 'root'@'localhost' (using password: NO)
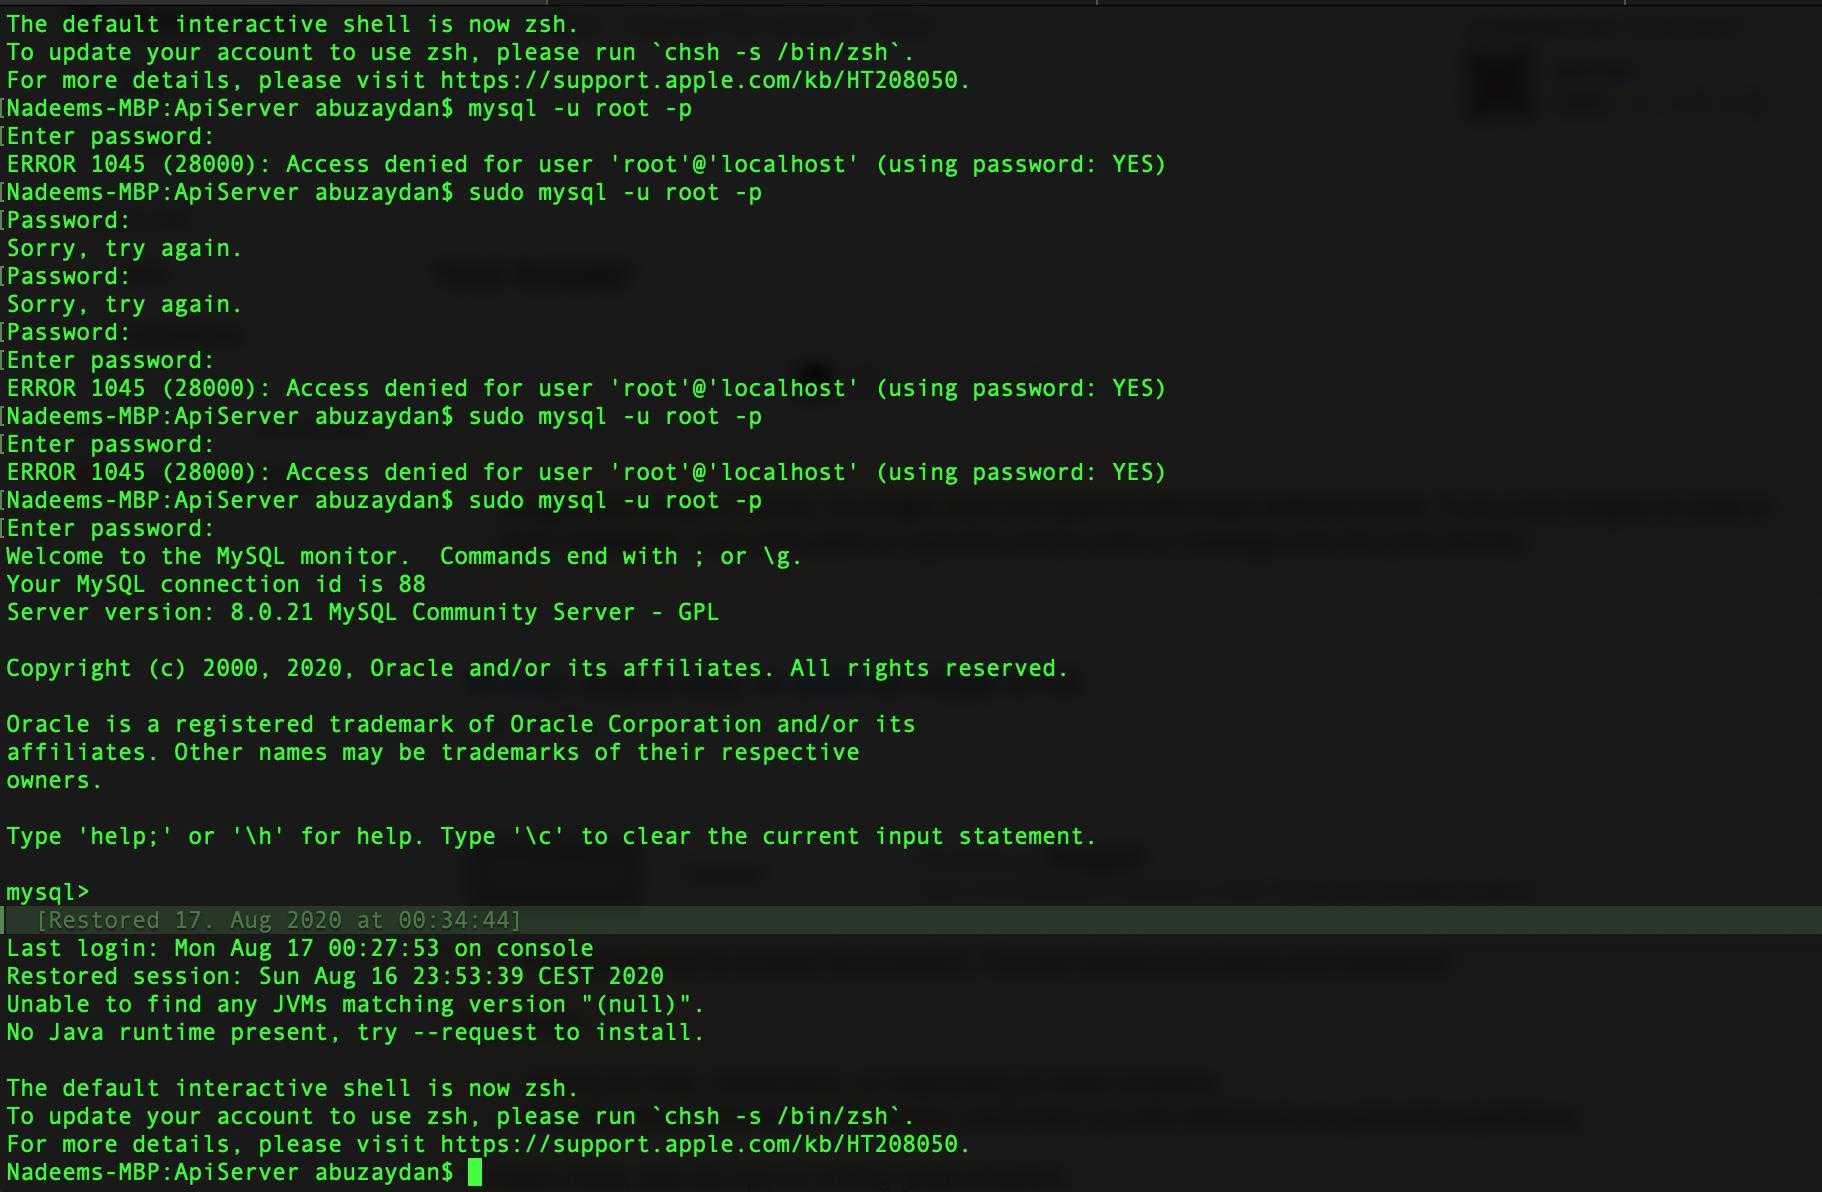
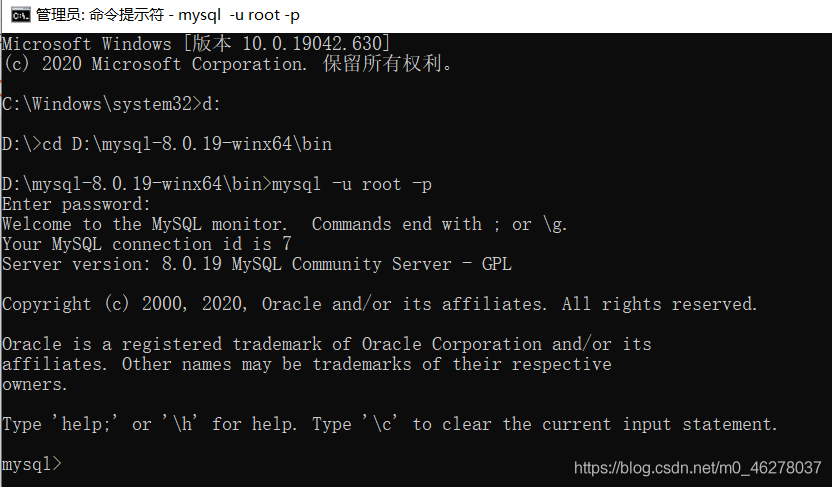
You’ll see this if you log into MySQL using the command line:
mysql -u root -p
You might also see this if you log in to MySQL using an IDE such as MySQL Workbench. Or even if you use phpMyAdmin.
What does this mean? How can you fix it?
There are a few solutions to this, which I’ve detailed below. Try one, and if it doesn’t work, try another one.
Also a tip for logging in: don’t enter your password in the command line itself, because this will be stored in your command history. Use the -p option, as mentioned above, and then you’ll be prompted to enter the password.
PHP
1. Не работает PHP. При открытии php-файла, браузер предлагает его сохранить, выводит php-код на страницу.
Проверьте подключен ли PHP в «httpd.conf». Правильно ли прописаны пути, указаны псевдонимы, сопоставлены ли файлы с расширением «php», «phtml» интерпретатору, php-код находиться в файлах с расшинием «php», «phtml», заключен ли php-скрипт в теги «<? ?>» или «<?php ?>».
2. Ошибки при подключении динамических расширений PHP.
Выдается сообщение:
Проверьте правильность пути к папке с расширениями PHP в «php.ini». Как правило это папка «ext» или «extensions» в каталоге PHP. Убедитесь, что в папке с расширениями присутствует подключаемая библиотека. Не подключайте рашрений, если вы не знаете для чего они предназначены и если они вам не нужны. Что касается «php_mysql.dll»: ее необходимо подключать только в тех версиях PHP, в которых поддержка MySQL не встроена в ядро. Если скачивали какую-либо библиотеку отдельно, не в архиве с полной версией PHP на сайте http://php.net, возможно она от другой версии PHP, и с вашей не совместима.
Access denied for user localhost to database
Запускали ли вы после инсталляции MySQL скрипт mysql_install_db для установки начального содержимого таблиц привилегий? Если нет, сделайте это. Обратитесь к разделу See Раздел 4.3.4, «Задание изначальных привилегий MySQL». Проверьте первоначальные привилегии с помощью следующей команды:
После новой инсталляции следует подсоединиться к серверу и создать пользователей, а также установить для них права доступа:
Если вы столкнетесь с такой ошибкой, как:
Запускали ли вы скрипт mysql_fix_privilege_tables при обновлении имеющейся инсталляции MySQL, если установленная версия — более ранняя, чем 3.22.11, а обновляется она до 3.22.11 или более поздней? Если нет, сделайте это. Начиная с MySQL 3.22.11, когда оператор GRANT стал функциональным, структура таблиц привилегий изменилась.
Если во время сеанса ваши привилегии изменились, то, возможно, их изменил суперпользователь. Перезагрузка таблиц привилегий отражается не только на новых подсоединениях клиентов, но также на уже имеющихся, как это показано в разделе See Раздел 4.3.3, «Когда изменения в привилегиях вступают в силу».
Если при попытке подсоединения не с того компьютера, на котором работает сервер MySQL, а с другого, вы получите сообщение об ошибке, приведенное ниже, то в таблице user отсутствует строка с таким именем хоста:
В Linux причиной такой ошибки может быть то, что бинарная версия MySQL скомпилирована с версией glibc, отличной от используемой вами. В этом случае нужно будет либо обновить ОС/glibc, используемые вами, либо загрузить исходный код MySQL и скомпилировать сервер самостоятельно. Как правило, исходный RPM компилируется и инсталлируется элементарно, так что это не составит серьезной проблемы.
Если будет выдано сообщение об ошибке, в котором имя хоста не указано вообще или указан IP-адрес, хотя вы при попытке подсоединения указывали имя хоста:
Попробуйте выяснить, что не так с вашим сервером DNS, и устраните неисправность.
Задайте IP-адреса вместо имен хостов таблицах привилегий MySQL.
Подключитесь к localhost если ваш сервер и клиент работают на одном и том же компьютере.
Если вы получите следующую ошибку, то эта проблема, возможно, связана с таблицей db или таблицей host :
Помните, что клиентские программы будут использовать параметры подсоединения, указанные файлах конфигурации или переменных окружения. Обратитесь к разделу See Приложение E, Переменные окружения. Если есть подозрение, что клиент отсылает неверные устанавливаемые по умолчанию параметры подсоединения, в случае, когда вы не задаете их в командной строке, проверьте ваше окружение и файл my. cnf в своей домашней директории. Можете также проверить конфигурационные файлы MySQL относящиеся ко все системе, хотя параметры клиентского подсоединения вряд ли указаны именно здесь. Обратитесь к разделу See Раздел 4.1.2, «Файлы параметров my. cnf ». Если ошибка Access denied возникает при выполнении вашей клиентской программы без каких-либо опций, убедитесь, что ни в одном из ваших файлов опций не указан старый пароль! Обратитесь к разделу See Раздел 4.1.2, «Файлы параметров my. cnf ».
![[solved] mysql: access denied for user ‘username’@’host’ (using password: yes) error in workbench, heidisql](https://clipof.ru/wp-content/uploads/2/9/f/29fe4a728239b0d2dee0dffaa7795d4e.png)

Если вы вносите изменения в таблицы привилегий непосредственно (с помощью операторов INSERT или UPDATE ), а ваши изменения, похоже, игнорируются, то следует выдать оператор FLUSH PRIVILEGES или выполнить команду mysqladmin flush-privileges — для того, чтобы заставить сервер перечитать таблицы привилегий. В противном случае ваши изменения вступят в силу лишь при последующем перезапуске сервера. Помните, что после того, как вы зададите пароль от имени пользователя, вам нужно будет указывать его только после сброса привилегий, т. к. серверу еще не будет известно о том, что вы изменили пароль!
Если ничего не помогает, запустите демон mysqld daemon с опцией отладки (например —debug=d, general, query ). В результате будет выведена информация о неудачных подсоединениях, с указанием хоста и пользователя, а также обо всех обработанных командах. Обратитесь к разделу See Раздел D.1.2, «Создание трассировочных файлов».
Если вы захотите настроить резервное копирование базы данных на другой сервер, или протестировать соединение с базой данных из другого сервера. И тогда вы можете столкнуться с ошибкой access denied for user root localhost, даже если вы указали верное имя пользователя, базу данных и пароль.
В этой небольшой статье мы рассмотрим почему возникает эта ошибка, а также как ее исправить и подключиться к MySQL из другого сервера через интернет.
phpmyadmin
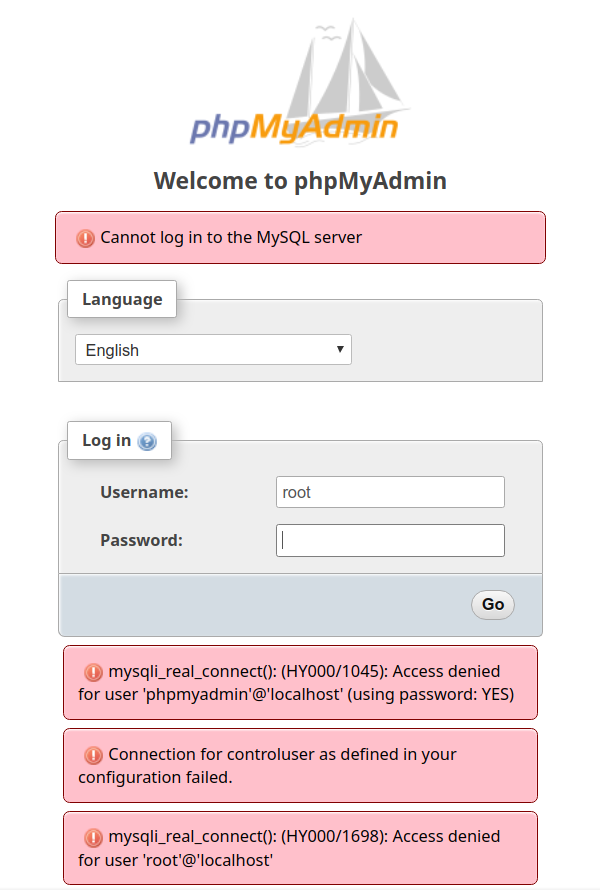
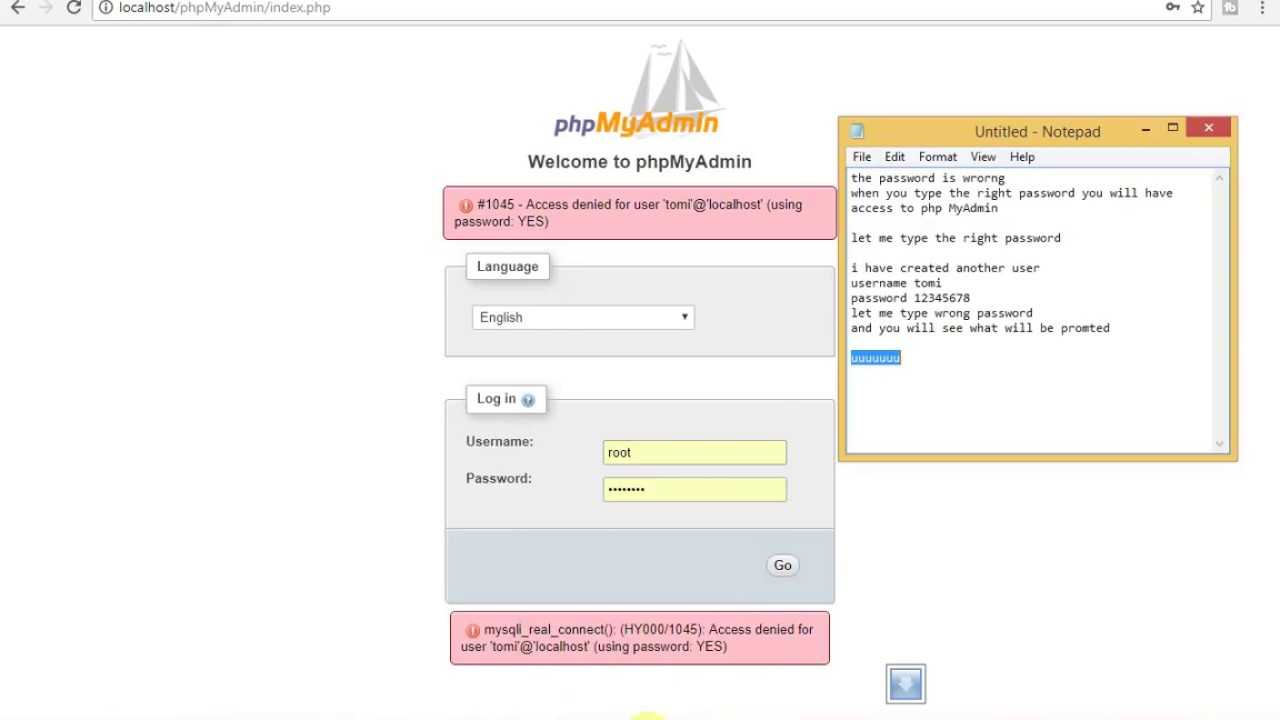
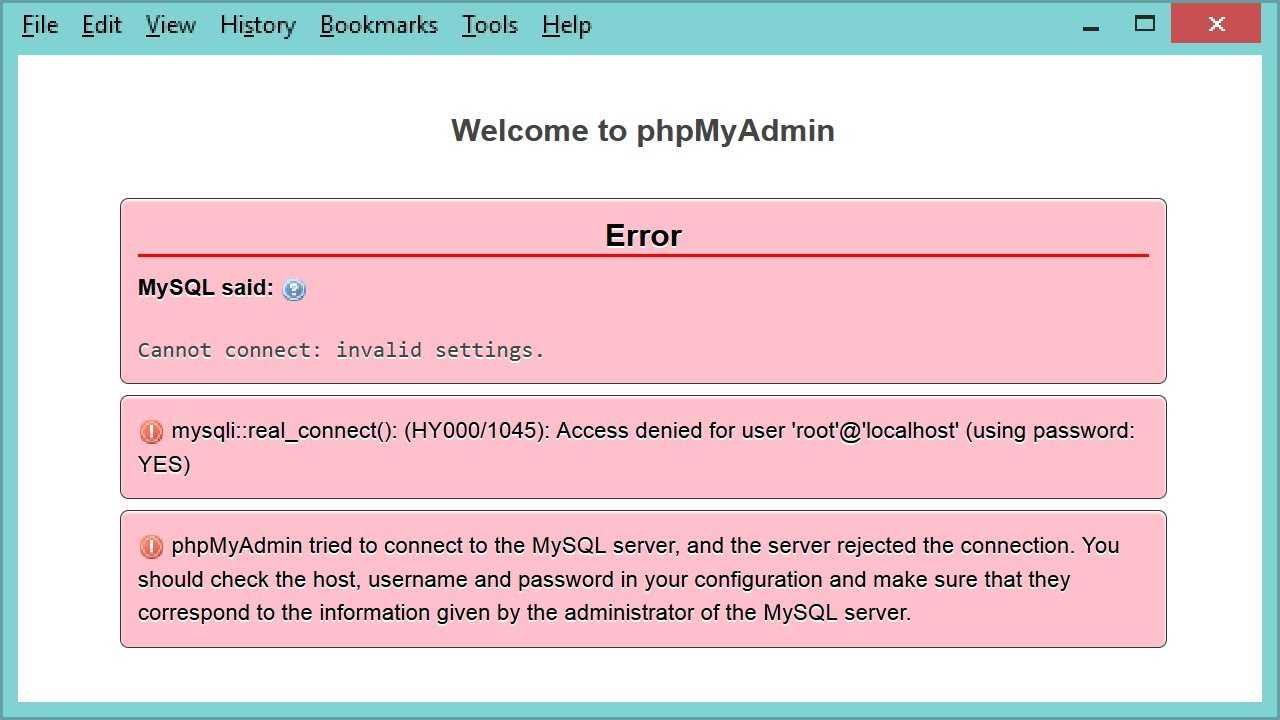
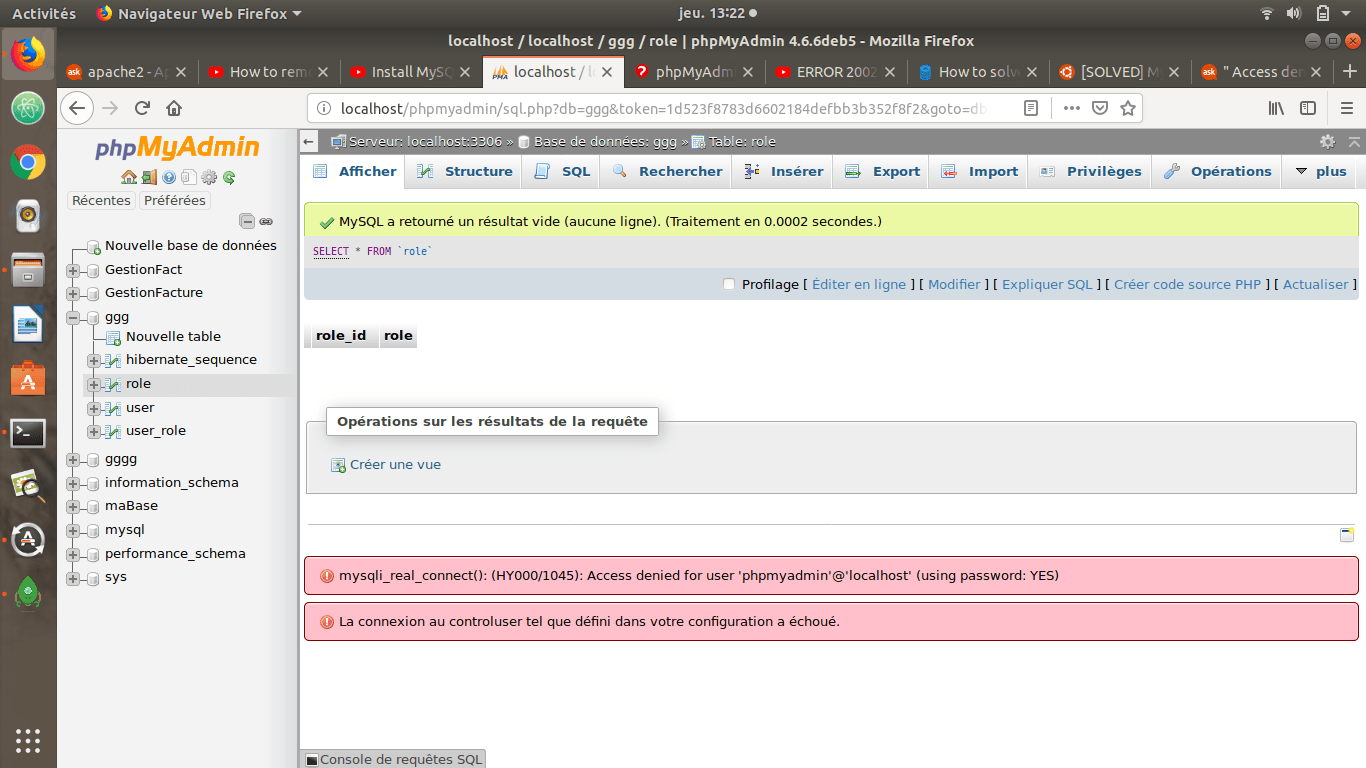
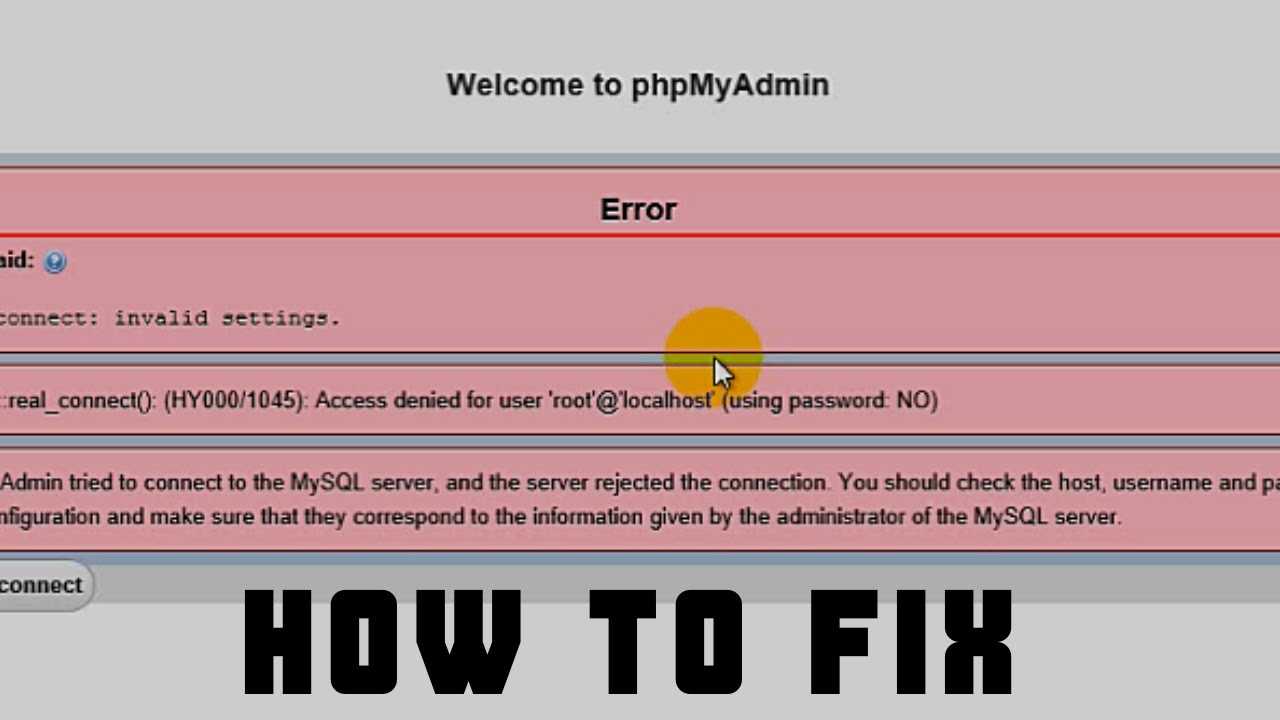
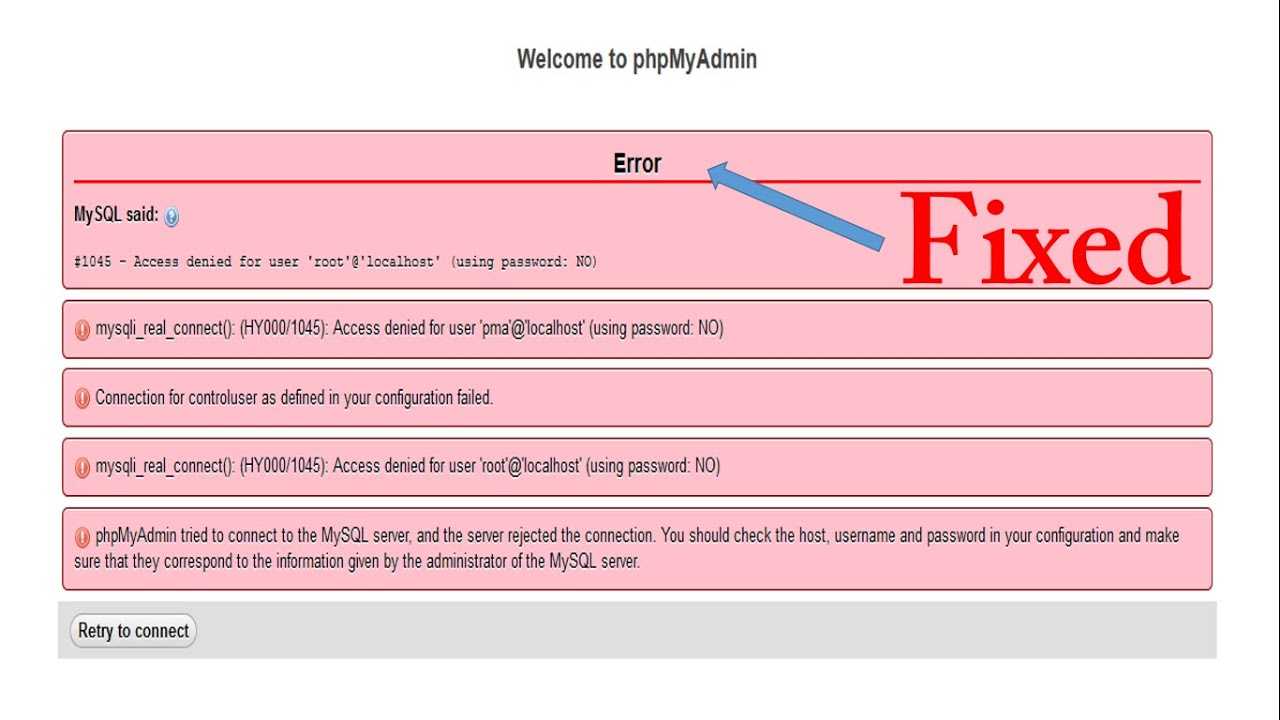
При открытии в браузере phpmyadmin получаете сообщение:
ErrorMySQL said: #1045 — Access denied for user ‘root’@’localhost’ (using password: NO)
Connection for controluser as defined in your configuration failed.
phpMyAdmin tried to connect to the MySQL server, and the server rejected the connection. You should check the host, username and password in your configuration and make sure that they correspond to the information given by the administrator of the MySQL server.
Ни логина, ни пароля вы не вводили, да и пхпадмин их нигде требовал, сразу выдавая сообщение об ошибке. Причина в том, что данные для авторизации берутся из конфигурационного файла config.inc.php Необходимо заменить в нем строчки
$cfg’Servers’$i’user’ = ‘root’; // MySQL user$cfg’Servers’$i’password’ = »; // MySQL password (only needed
$cfg’Servers’$i’user’ = ‘ЛОГИН’; $cfg’Servers’$i’password’ = ‘ПАРОЛЬ’
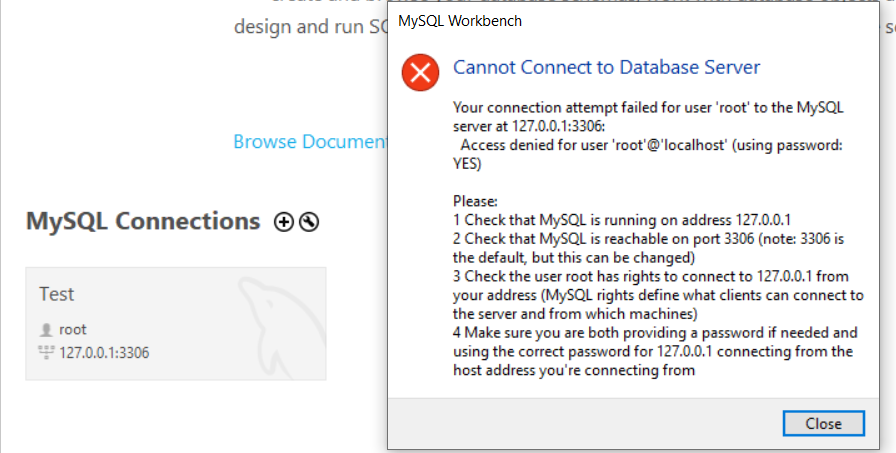
SQL Error (1045) Scenario
In this case ” Access denied for user ‘username’@’host’ (using password: YES) ” error has appeared while connecting SQL server hosted on Webhosting (cPanel) and the user is trying to connect from his local PC.While connecting to an SQL server hosted on your web hosting service provider using database tools like MySQL Workbench or HeidiSQL sometimes the following error may occur
SQL Error (1045) in statement #0: Access denied for user ‘username’@’host’ (using password: YES)
The error message popup screenshot is as follows,
Access denied for user ‘username’@’host’ (using password: YES)Error inHeidiSQL database tool.
Since this error is also associated with an invalid username and password, some forums suggesting to check login credentials. But in this case, the error is appeared even after entering the correct username and password.
Even if you try to connect MySQL server using different database tools like Workbench, Navicat for MySQL, etc problem will not get solved.
Ошибки запрета доступа в MySQL
В MySQL учётная запись (УЗ) определяется именем пользователя и клиентским хостом, с которого пользователь может подключиться. УЗ может также иметь данные для аутентификации (например, пароль).
Причин для запрета доступа может быть много. Одна из них связана с учётными записями MySQL, которые сервер разрешает использовать клиентским программам при подключении. Это означает, что имя пользователя, указанное в соединении, может не иметь прав доступа к базе данных.
В MySQL есть возможность создавать учётные записи, позволяющие пользователям клиентских программ подключаться к серверу и получать доступ к данным. Поэтому при ошибке доступа проверьте разрешение УЗ на подключение к серверу через клиентскую программу.
Увидеть разрешённые привилегии учётной записи можно, выполнив в консоли команду SHOW GRANTS Входим в консоль (пример для Unix, для Windows консоль можно найти в стартовом меню):
В консоли вводим команду:
Дать привилегии конкретному пользователю в БД по IP-адресу можно, используя следующие команды:
Ошибки запрещённого доступа могут также возникнуть из-за проблем с подключением к MySQL (см. выше).
Solution 2: Edit My.cnf File
If the above solution did not work, you may need to edit the mysql.cnf file to allow for changes to the root account.
Step 1: Open the my.cnf file. This may be stored in:
/etc/my.cnf
/etc/mysql/my.cnf
If you’re not sure where it is, search your MySQL installation folder (e.g. on Windows or Mac) for the file.
If you don’t have a my.cnf file (MacOS does not include one by default). You can create one in the /etc folder if you like.
Step 2: Add the word skip-grant-tables under the word . Your file may look like this:
skip-grant-tables
Step 3: Restart the MySQL server.
Step 4: Login to the root account:
mysql -u root -p
Step 5: Flush the privileges, which tells the server to refresh the grant tables and apply your changes, with this command:
Step 6: Set a new password for the account:
Substitute the word your_new_password with a new secure password that you want to use for the root account.
Step 7: Open the my.cnf file you opened in step 1, and remove the line about skip-grant-tables, and save the file.
Step 8: Restart the MySQL server again.
Step 9: Log in to the root account again:
mysql -u root -p
You should now be able to log in successfully with your new password and not get an error.